The big picture: what you actually need
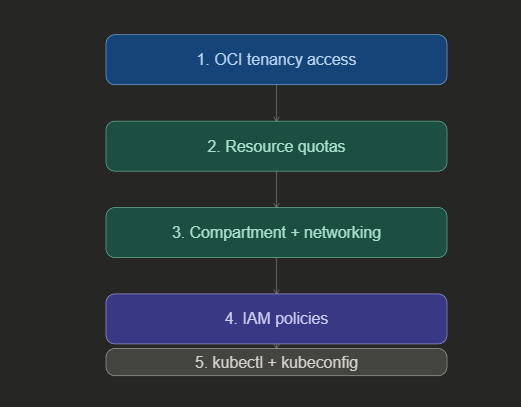
Think of these five prerequisites as a checklist you work through in order. Skip one and you’ll hit a wall later — usually at the worst possible moment. The diagram below shows how they build on each other.
1. OCI tenancy access
Your OCI tenancy is your Oracle Cloud account — the root container for everything you’ll create. The good news is that OKE is available in every OCI region, so wherever you’re deployed, you’re covered. No special region selection is needed for OKE access.
If you’re working in an existing tenancy, confirm you have sufficient administrative access to create resources in the next steps. If you’re setting up a fresh tenancy, OKE will be available to you out of the box.
2. Resource quotas (service limits)
OCI enforces service limits on every resource type. Before creating a cluster, verify that you have sufficient quota for the three main resource categories on which OKE depends.
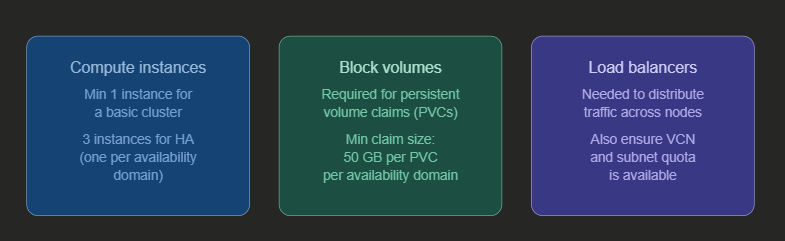
Important: For a highly available cluster spanning three availability domains, you need at least three compute instances — one per domain. Plan your quota request accordingly if you’re targeting HA from day one.
3. Compartment and network resources
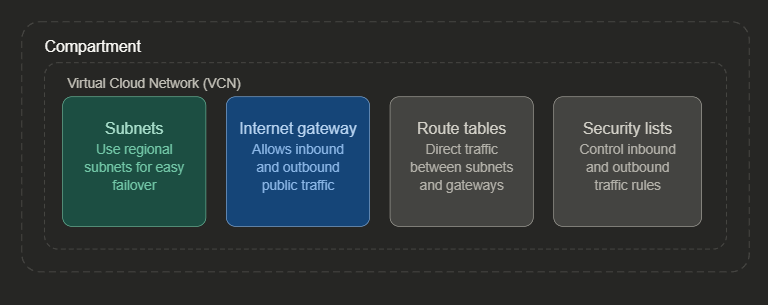
OKE clusters and their associated network resources live inside a compartment — a logical container within your tenancy. You’ll need a dedicated compartment ready before creating a cluster, and inside it, a properly configured virtual cloud network (VCN).
When creating a new cluster, you have two options: let OKE automatically create and configure all these network resources for you, or specify your own pre-configured resources. If you bring your own, they must already be correctly set up before cluster creation begins.
If multiple teams will create clusters in the same tenancy, create a dedicated compartment for each team. This keeps resources organized and makes access management far simpler down the line. Use regional subnets rather than availability-domain-specific ones — failover becomes much easier to manage.
4. IAM policies
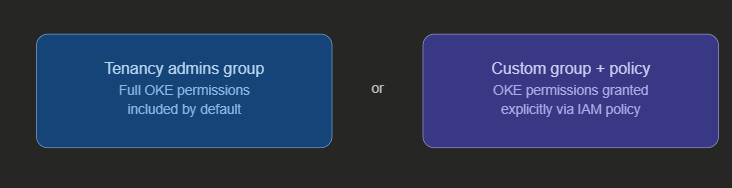
To create and manage OKE clusters, your user account must belong to one of two groups. Either the tenancy administrators group — which has all permissions by default — or a custom group that has been explicitly granted OKE permissions through IAM policies.
Policies are the central mechanism for controlling who can do what in OCI. If you’re not a tenancy admin, work with your OCI administrator to ensure the correct policy statements are in place for your group before you attempt cluster creation.
5. kubectl and kubeconfig
Once your cluster exists, you need a way to talk to it. The standard tool is kubectl — the Kubernetes command-line interface. OCI gives you two ways to get it:
You can use the OCI Cloud Shell, which has kubectl pre-installed and ready to go with no local setup required. Or you can install kubectl locally on your own machine, which gives you more control over versions and configuration.
Either way, each user must configure their own kubeconfig file — a YAML file that tells kubectl how to reach the cluster and authenticate. This is a per-user requirement; you cannot share or reuse another user’s kubeconfig. The OCI CLI makes generating this file straightforward:
oci ce cluster create-kubeconfig \
  --cluster-id <your-cluster-ocid> \
  --file $HOME/.kube/config \
  --region <your-region> \
  --token-version 2.0.0
Remember: Kubeconfig files are personal. Every user who needs cluster access must generate and maintain their own. Sharing kubeconfig files is not supported and will not work correctly.
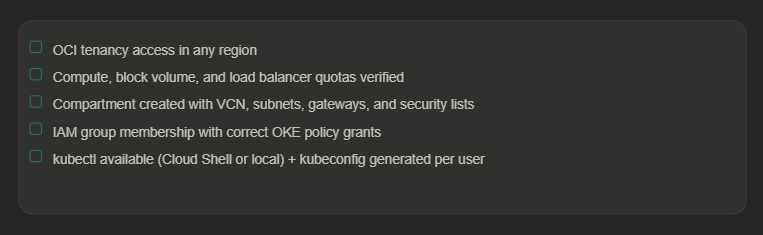
The complete prerequisites checklist
Before you hit “Create cluster”, run through this list:
What comes next
With all five prerequisites in place, you’re ready to create your first OKE cluster — either through the OCI Console using the guided workflow, or via the REST API for programmatic control. Once the cluster is up, you’ll configure your kubeconfig and begin deploying workloads using kubectl, choosing between managed nodes or virtual nodes depending on your workload’s requirements.
If you haven’t read the previous post in this series on virtual nodes and managed nodes, it’s worth going through that first — it’ll help you make the right node type decision from the start.


Recent Comments